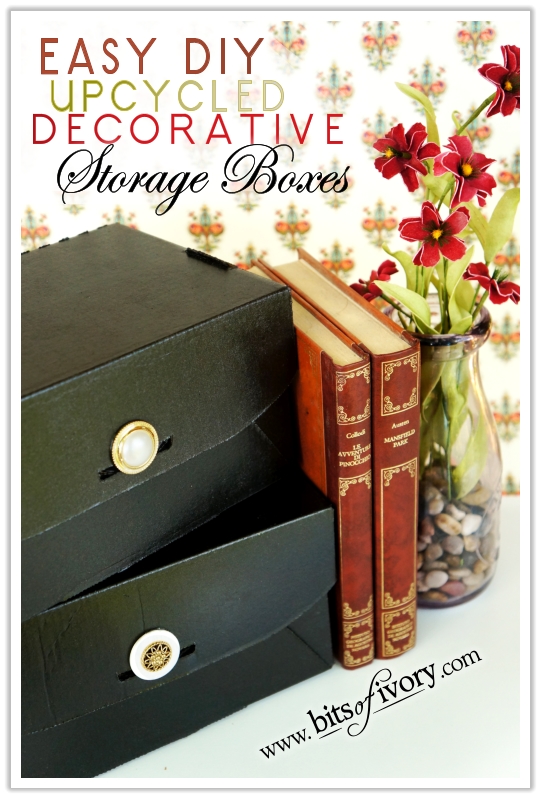
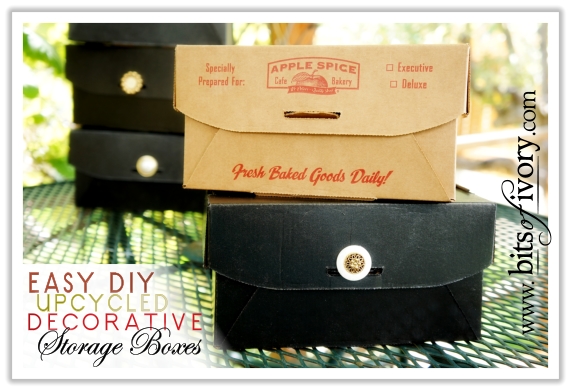
As you are aware by now, I love really simple projects that look impressive, and these decorative storage boxes definitely qualify. Upcylced from very utilitarian but not so pretty cardboard boxes, they provide a place to keep odds and ends close at hand without the usual clutter and chaos. The cardboard containers I used were re-purposed from a local bakery’s boxed lunch delivery, and at approximately 8″x6″x4″ they are the perfect size for pens, colored pencils, brushes, cords, plastic silverware or even batteries for remote controls.
Like so many other upcycled projects, this one came from a Grandma O moment (my muse when it comes to the “reuse” leg of the recycle triangle). When our sandwiches had been reduced to crumbs and it was time to toss the bakery boxes*, I simply couldn’t bring myself to do it. They were so perfectly sized and shaped, and it seemed such a shame not to take advantage of the organizational opportunities. I kept them tucked away until I could figure out exactly how to make them pretty enough to leave out on a shelf or desk.
Someone, somewhere told me once that you can’t paint cardboard. So I haven’t. Not on purpose, anyway. . . not until now. Paint seemed like such a perfect solution, though, and when I thought of all the times I’ve used cardboard to protect a surface while I spray painted something else, and I remembered that the boxes always seemed to survive, I decided to give it a try. For the record, friends, you can paint cardboard.
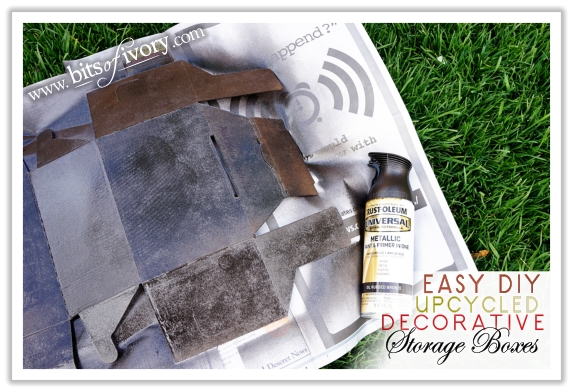
The boxes were easily disassembled to lay flat for painting. That made them remarkably easy to prepare. If your box doesn’t come apart so easily you can certainly paint it as is, though it will take more time to paint all of the surfaces. I chose Rustoleum Metalic spray paint in Oil Rubbed Bronze for a deep black with a bit of depth and sheen to it.
I started off with a very light, even coat of paint to seal the box without making it soggy. When that was dry to the touch I continued with several light coats of paint until the box was perfectly covered, following the directions on the paint can. You definitely want to do this outside, if possible, or where there is abundant ventilation. I allowed my box to dry 24 hours before reassembling.
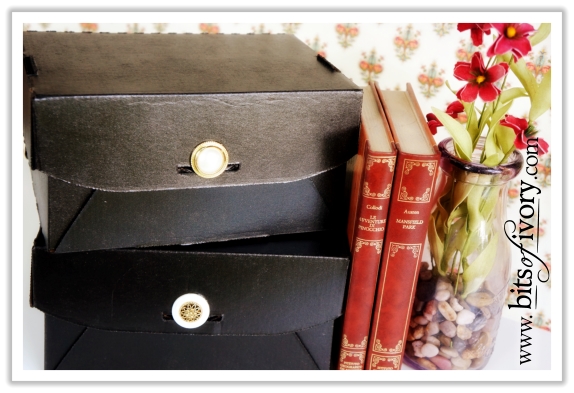
As a final touch, I added coordinating decorative buttons for “pulls” by punching a small hole through the box for the button shank and then gluing the button into place with a strong adhesive.
There you go! It’s so easy it’s embarrassing, but so lovely you won’t care.
* These boxes came from Apple Spice Cafe and Bakery. I highly recommend the Granny Apple Turkey sandwich, which is fantastic. This article was not sponsored.
